




Safe kitesurfing: right of way rules and tips
18.11.2026

Safe kitesurfing means knowing the right of way rules, using good safety gear and checking your gear and the conditions before you go out. Kitesurfing has become a lot safer in recent years. Since right of way rules were introduced, there are fewer accidents on the water. The gear we use also has to meet certain requirements to keep kitesurfing as safe as possible for everyone. In this blog we explain the right of way rules and what the ISO standard for the quick release means.
| Situation | Who has right of way? |
|---|---|
| On the beach | The kiter heading out into the water |
| Kiters on a collision course | The kiter with the right hand forward (starboard) |
| Kiters passing each other | Upwind kiter: kite high. Downwind kiter: kite low |
| Overtaking | The slower kiter |
| In the waves | The kiter riding the wave |
| Kiter in the water or in a lesson | Always the kiter body dragging or in a lesson |
| Other water users | Always the other water user |
What are the right of way rules in kitesurfing?
The right of way rules in kitesurfing decide which kiter gives way and which kiter holds their course, so you don't hit each other or other people on the water. More and more people kite and the spots keep getting busier. Kiters who ignore these rules create dangerous situations where accidents happen. Keep in mind that right of way is something you're given, never something you take. Even when you have it, you still avoid a collision, because the other kiter may not know the rules or may not have seen you. We explain every rule below, so you know exactly what to do on the water. Do you know them all already, or are there a few you hadn't heard of?
Rule 1: the kiter going out has right of way
This rule protects the kiter on the beach. That kiter runs more risk, because they're close to hard obstacles and people on the beach. The kiter out on the water can safely head back out to sea, so the kiter on the beach can get into the water safely as quickly as possible.

Rule 2: the kiter with the right hand forward has right of way
The starboard kiter (right hand forward, wind coming from the right) always has right of way over the port kiter (left hand forward). The starboard kiter holds their course and keeps riding without changing speed. The port kiter has to change course by adjusting direction and speed, and always passes the starboard kiter downwind. This way you know exactly which kiter gives way and which kiter holds their course, and you avoid accidents.

Rule 3: the upwind kiter keeps the kite high
This rule stops your lines getting tangled with another kiter's lines. When two kiters pass each other, the kiter riding upwind keeps their kite high, above 45 degrees. The kiter riding downwind keeps their kite low, below 30 degrees. That way the lines don't touch and can't tangle.

Rule 4: the slower kiter has right of way
If you're riding behind someone slower than you, you give way to them. Often the kiter in front hasn't noticed you behind them. If they suddenly turn, there's a good chance you'll collide. Slower kiters also tend to have less experience than faster ones, so you're better off not taking any risks.

Rule 5: the kiter on the wave has right of way
The kiter surfing a wave always has right of way. A kiter on a wave is less stable than a kiter who's freeriding. And it's no fun finally catching a good wave and having to give it up because someone won't move out of the way. This rule prevents accidents and saves a lot of arguments.

Rule 6: the kiter body dragging has right of way
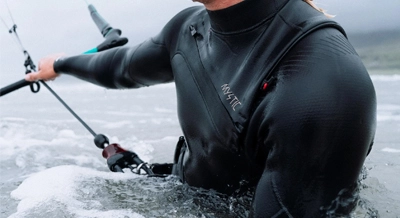
A kiter who is body dragging always has right of way. While body dragging, their view is very limited and there's a good chance they can't see you. You're on a board, so it's easier for you to steer clear. This rule prevents accidents and keeps extra pressure off the kiter in the water.

Rule 7: the kiter in a lesson has right of way
A kiter in a lesson is usually slower than someone who already rides comfortably. Kiters in lessons have less experience and can panic if you get too close. They often don't know yet how to react in a dangerous situation, and that's when accidents happen.
Rule 8: leave a big free zone when you jump
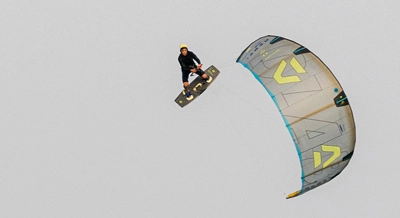
Before you jump, make sure you have enough space around you. Keep at least 50 metres clear downwind to land your jump, and 30 metres upwind, so you don't run into other kites when you send your kite. To be sure, check behind you as well, so there's nobody riding there you could put at risk with your jump. While you're jumping you don't have right of way, so the space has to be clear before you take off.

Rule 9: all other water users have right of way
You'll often share the water with other water users. Kitesurfers always give way to them, because we can steer and manoeuvre faster. Our long lines between the bar and the kite matter too. Other water users can't tell where the lines run, so they may make unexpected moves, and that's how accidents happen.

What safety gear do you need for kitesurfing?
For kitesurfing you need at least a bar with a working quick release and a leash; a helmet and an impact vest make it a lot safer.
- Quick release: the safety system on your kite bar. Push it away and the kite loses its power, and you're only attached to the kite by your leash.
- Leash: the line between your harness and the kite, so you don't lose your kite when you use the quick release. You can also replace a separate kite leash on its own.
- Helmet: protects your head when you fall or when the kite pulls you along unexpectedly. Have a look at our kite helmets.
- Impact vest: absorbs the blow in a hard fall and gives you a bit of buoyancy, but it's not a life jacket. Have a look at our impact vests.
- Line cutter: a small hook knife, often in a pocket on your harness, for cutting lines if you get tangled up in them.
What does the ISO standard for the quick release mean?
A quick release marked ISO 21853 has been tested and works under tough conditions too: it opens within 2 seconds with a force of no more than 170 N. Kitesurfing gear is constantly being improved. The Global Kitesports Association (GKA) set up this safety standard for the quick release together with the International Organization for Standardization (ISO) and an international team of engineers and experts. The ISO standard has applied since 14 February 2020.
When a quick release meets every requirement and has been tested by a certified institute, the number ISO 21853 is embossed on it. The quick release is the part that has to work when you get into trouble. Thanks to the ISO standard, you can see as a buyer which quick releases meet these requirements. That makes it easier to choose a safe kite bar, with a quick release you know will do its job in a stressful moment.
The ISO standard applies in every country and replaces national standards, such as the French AFNOR standard. The quick release is tested in different conditions:
- Water with and without sand
- Dry, clean conditions
- Dry conditions with sand
- Cold, wet conditions
Other aspects of the quick release are tested too, such as the percentage of signal colour and the strength of the material. A quick release also needs a release for the safety leash. Testing is done by the Fraunhofer Institute in Rostock (Germany), the independent institute that may issue an official certificate. You can read more about the standard at the Global Kitesports Association.
Check whether the number ISO 21853 is on the quick release. With an older bar without that number, you can't be sure the quick release meets these requirements.
What should you check before you go on the water?
Before you go on the water, check the wind, your gear and the spot. These five checks prevent most problems:
- Wind and weather: check the forecast and the gusts, and don't go out in a thunderstorm or offshore wind. Offshore wind blows from the land out to sea, so if something goes wrong it carries you away from the beach.
- Your gear: check your lines, your quick release and your kite for wear. How to do that is in our blog on checking your kite gear.
- The spot: only kite where it's allowed, and keep your distance from swimmers and the shore.
- Your level: only kite in conditions that suit you. Just starting out? Read how to learn to kitesurf first.
- A buddy: preferably don't go alone, so someone can help you launch and land, or step in when something goes wrong.
Frequently asked questions
How often should you test your quick release?
Test your quick release before every session: open it once on the beach and reset it. Rinse it with fresh water after kiting, so no sand or salt stays inside. If it opens stiffly, have it checked or replaced.
Do the right of way rules apply to wing foilers and windsurfers?
Wing foilers and windsurfers follow the same basic rules for giving way on the water, such as starboard before port and the slower rider goes first. As a kiter, though, you always give way to other water users (rule 9), because your long lines take up more space and you can steer clear faster.
Do you still have to give way if you have right of way?
Yes. Having right of way never means you can hold your course whatever happens. If the other kiter doesn't react, you still do everything you can to avoid a collision. Kiteboarding schools teach it as right of way being given, not taken. Make your intentions clear early, for example by holding a steady course, so the other kiter knows what you're going to do.

You have no product(s) in you basket.
Not sure where to start?
Contact our customer service for advice
